LUKS encrypted ext4 drive in Windows: VirtualBox Raw Disk Access
A while back I encountered a dilemma. One of my gaming station gone linux server’s LUKS encrypted ext4 RAID1 drives had died, and I really wanted to go back to Windows to play some games. However, I didn’t have another place to put the 1.5TB data on the remaining drive while formatting it to NTFS. Therefore I had two options: 1. buy a new harddrive and 2. figure out a way to access the remaining drive through Windows. Of course I went with the second option.
It took a few days of on and off tinkering, but somewhere along the line I read about the possiblity of giving complete control of a drive to a VirtualBox guest operating system through something called Raw Disk Access. My final solution consisted of a Windows host OS running on an old 60GB SSD, an 8GB Debian virtual machine with complete access to the LUKS encrypted raid drive, and a samba share, sharing the unencrypted files back to windows through a dedicated host-only network adapter.
I made a YouTube video detailing the steps, but it is in Swedish and is quite lengthy, so I figured I’d write the guide in a compacted form here.
Here we go!
Prerequisites
- Windows 7,8,8.1,10
- VirtualBox (I have tested version 5+)
- Debian guest virtual machine (or other linux OS where you know how to handle LUKS encryption and RAID)
- A mysterious linux encrypted drive Windows doesn’t understand
The tricky part is the raw disk access. We will use “advanced topics” that are deemed “expert only” by the folks over at VirtualBox [1].
The Steps
Creating the Raw Disk Virtual Image
We first have to figure out what disk number is our encrypted drive. We open disk manager and look at the number after Disk:
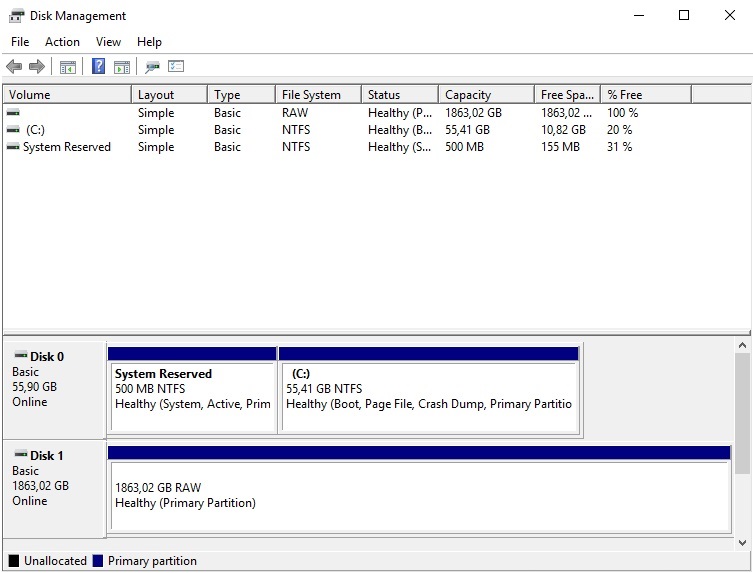
Now when we know our disk number we can create the raw disk image. Find the installation folder of VirtualBox, usually C:\Program Files\VirtualBox.
Open an admin terminal in this folder (for example, press start, search for cmd, right click and choose run as administrator, then `cd C:\Program Files\VirtualBox).
From here we will run our magic command: WARNING:The following command can have unintended consequences if you run it on another drive, so be careful.
VBoxManage internalcommands createvmdk -filename C:\Path\to\new\image -rawdisk \\.\PhysicalDriveX
Where path\to\new\image.vmdk is the complete path of where you want to place your virtual image, and X is the disk number you discovered earlier.
Attaching the image to the guest OS
Once again, you must run VirtualBox in administrator mode (right click the icon and choose run as administrator). Unfortunately I haven’t disovered a way around this yet.
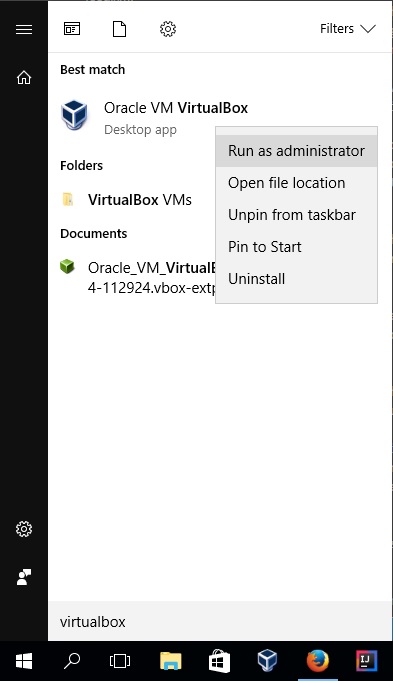
Open the settings of your virtual machine, choose disks, press add, choose existing, select the image you previously created
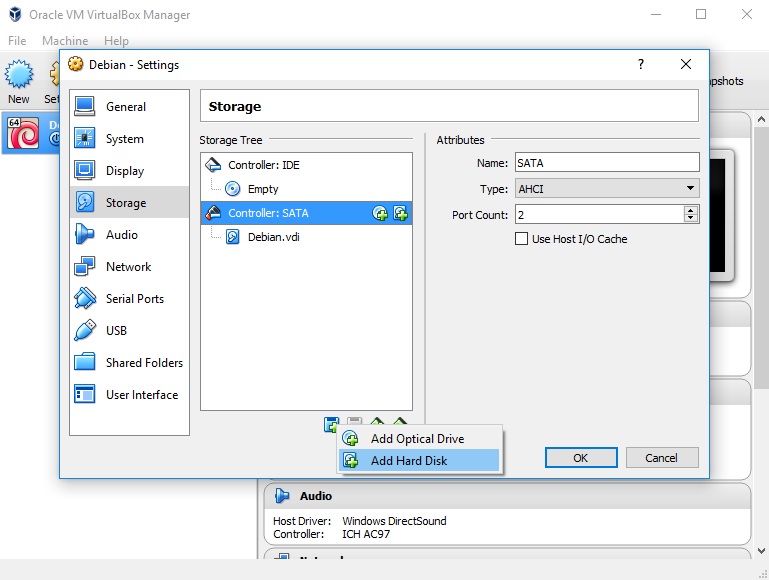
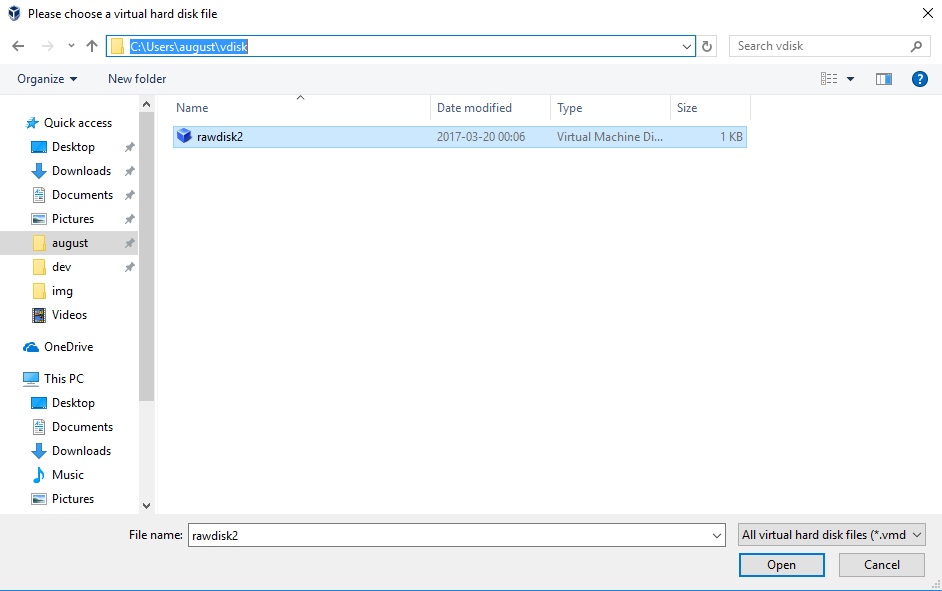
Creating a host-only network interface
But before we start the virtual machine, let’s also add a virtual network interface we can use later:
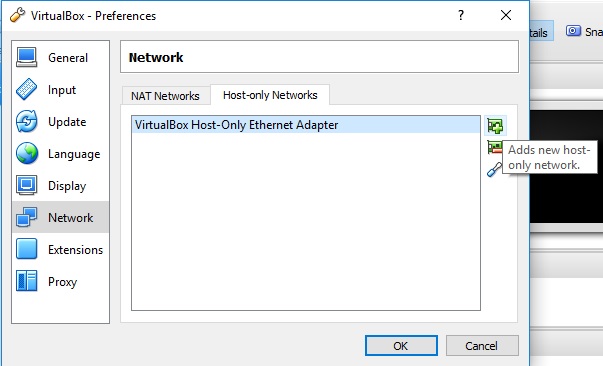
Open virtual box settings, open networks, add virtual network adapter, choose host only network.
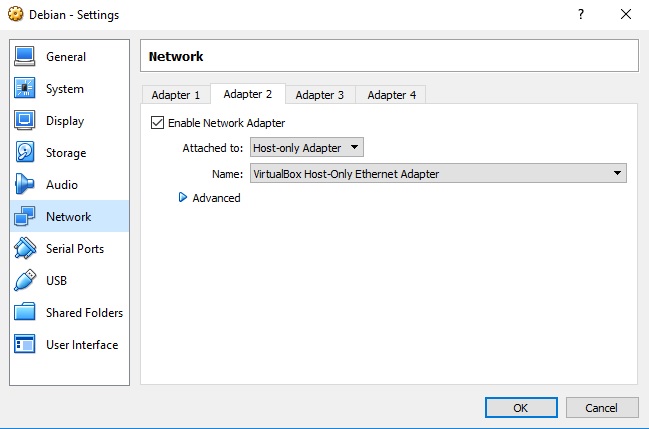
We then have to connect our guest OS to this interface by adding it as a network adapter under the guest settings.
Mounting the drive
Now we can finally start our guest OS. Notice: If we don’t run virtualbox as administrator it will complain about inaccessible drives.
To check that the drive is recognized we can run
# fdisk -l
We use cryptsetup to decrypt the encrypted drive
# cryptsetup open /dev/sdb1 encrypted
Where /dev/sdb1 is the partition of encrypted drive. This will create an unencrypted virtual device /dev/mapper/encrypted
Mount it where you want, and check that you can see the files
# mount /dev/mapper/encryted /path/to/mount/point
$ ls /path/to/mount/point
Setting up network and samba on the linux guest
Set up the new network interface:
$ ip link show
make notice of the added interface name (in my case eth2)
edit /etc/network/interfaces
# vim /etc/network/interfaces
Add at the bottom:
auto eth2
iface eth2 inet dhcp
reload networking
# service networking restart
check your new IP address with
$ ifconfig eth2
Samba configuration
If you don’t already have samba installed:
# apt-get install samba
Configure the unencrypted share
# vim /etc/samba/smb.conf
Add at the bottom of the file:
[MyShareName]
  path = /path/to/mounted/encrypted/drive
  read only = no
  valid users = august
I added a valid users directive just to make it slightly more secure, but it is not strictly necessary. To give your samba user a password, run:
# smbpasswd august
and input your chosen password.
Restart samba
# service smbd restart
Finished!
At this point your network share should be visible in windows explorer under the network folder.
Have fun!